Finding Stars

I know you remember glow-in-the-dark stars from when you were a kid! Tonight, instead of sticking them on the ceiling, I sprinkled them on the floor to make a game for Ava…

Before she went to bed, I made Ava hide away while I sprinkled glow-in-the-dark stars (without sticky backs) all over the living room. Then I turned off all the lights, handed Ava a basket, and told her we were going to go star hunting. She had fun finding and picking up all the stars, and it was rather pretty. I think I’ll keep them hidden away to pull out later so we can do this again.

Papier-Mache Bowl

When I was a kid, I did papier-mache projects using newspaper with a flour and water mixture. But I found a simple (and much prettier) version in FamilyFun magazine’s June/July 2010 issue that I thought Ava would enjoy trying. Tim actually joined in and made his own, too. I loved the way they turned out. We use Ava’s bowl to hold our mini dry-erase markers. Here are the instructions…

Supplies

  • Tissue paper – torn into small pieces appx 2″x2″ (we used blue and white, because that’s what we had, but can use all one color or several colors.
  • Small bowl (we used one of Ava’s toy kitchen bowls, because it was small and more manageable for a two-year old to work on and complete)
  • Paintbrush
  • Plastic wrap
  • Cooking spray/oil
  • 1/4 cup all-purpose Flour
  • 1/2 cup Water

Instructions

  1. Prep: Rub the cooking oil/spray onto the outside of the bowl. Cover the bowl tightly with plastic wrap. Mix the flour and water in another bowl/container until smooth.
  2. Create: Brush large area of the bowl with the flour and water mixture and then cover it with tissue paper pieces. Then continue the process until entire bowl is covered with tissue paper. Continue this layering process of the entire bowl at least four times. (We did the first layers with white to create a white inside for our bowl, and then we did the last layer or two with the blue.)
  3. Finish: Allow to dry for at least 12 hours before removing the plastic wrap and bowl from the new papier-mache bowl. Enjoy!

“Fixing Her Plate”

I cut pictures of food from some of the grocery ads in our newspaper. I tried to keep them similar in scale, and then I gave them all to Ava to arrange on a plate (I used a photo of a place setting that I came across in a magazine, but it would have been better to just use one of our real plates). She “fixed her plate” at the kitchen table, while I made the real food. After she was done, we put all the pieces in a ziploc bag and put it away until next time.

Visiting Our Own Zoo

Today, Ava wanted to visit the zoo, but that was not going to happen, so instead we made our own zoo to visit in our living room. I am listing some simple things we did, in case it helps to get your own imagination going…

  • Gather all stuffed animals and place them all around the room (or house), maybe hiding a few.
  • Bring baby doll along for the trip.
  • Grab a piece of paper to be the zoo map.
  • Grab some play money for admission.
  • Have a petting zoo corner.
  • Feed the animals. We used a paper towel roll as a food machine. Ava dropped a play coin down the top of the tube while I held the bottom. Then I told her to put her hand underneath to catch the food, and when I moved my hand, she caught the coin (magically transformed into food, of course).
  • Have fun visiting the zoo!

Tiny Bouquet Vase

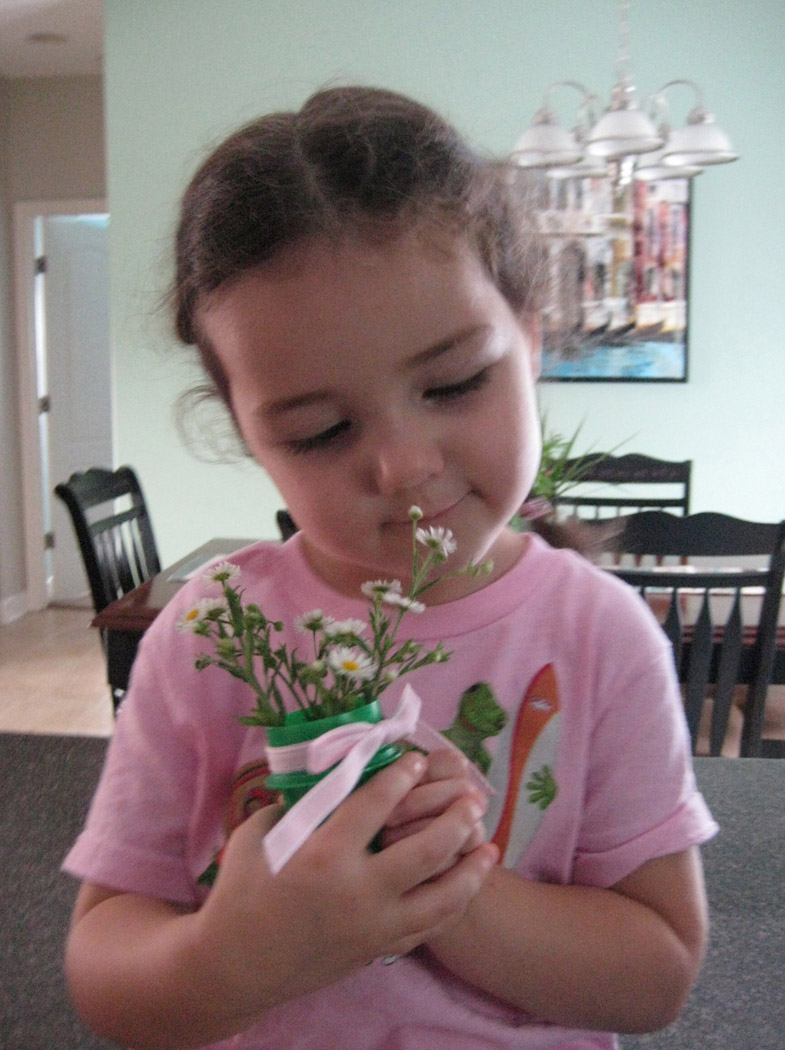
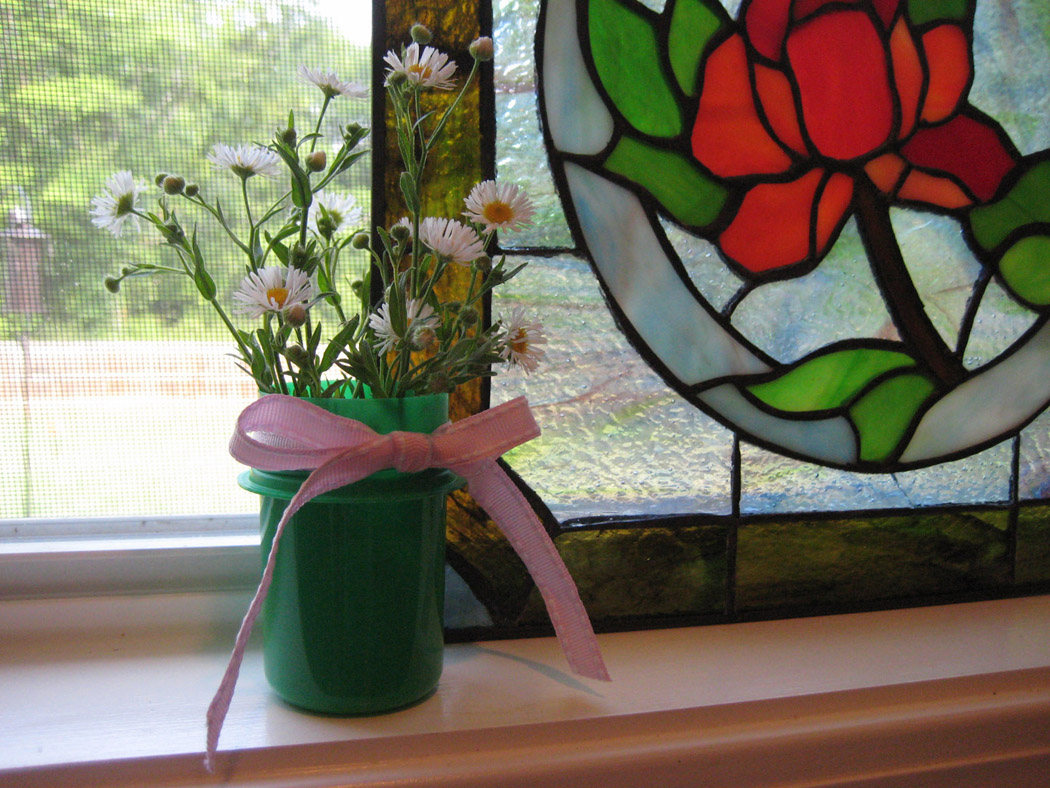
Ava proudly brings me her small fist full of flowers on her return from almost every outdoor adventure. She grabs dandelions on our walks and clover on the way to the mailbox…

When she was younger, I simply thanked her for the thoughtful gift and tucked a couple of the little flowers behind my ear or sat them on the counter until they wilted an hour later. If the flowers were particularly meaningful to her or to myself, I would place the short-stemmed bouquet in a small cup of water.

Now that my little flower gatherer is a bit older, it seems more important that I display her small bouquets with more care and with a small amount of the thoughtfulnesss with which they were given. The good ole plastic cup just isn’t cutting it anymore – I’m tired of looking at it, and it just isn’t ideal for holding the flowers upright. So, I re-purposed a liquid laundry detergent lid! It’s the perfect size for Ava’s child-sized bouquets, and with a ribbon tied around the neck, it looks rather attractive sitting on the windowsill or counter. A baby food jar also makes a great small vase!

Thank You

The fact is, we don’t know what the future holds. Tomorrow may be brighter than today, or it may hold sorrow – but, thank God, when we know HIM, we are filled with true peace and joy in every situation.

My heart is overflowing today with thankfulness to the Lord for His goodness to me. He is so wonderful! I am thankful that Jesus died on the cross and rose from the dead so that I could be saved from hell and look forward to eternity in heaven. I am thankful that He did that not only for me, but for all those whom I love and care about. I am thankful that my life here on earth has purpose. I am thankful that God has protected me when I could have been hurt, given me wisdom when I asked for it, and the list goes on and on. Perhaps, one thing I am most thankful to Him for is filling me up with His Holy Spirit. Besides the day I asked Jesus to come into my heart, the best part of my walk with Him is being filled with His Spirit. There is nothing that compares with the power, discernment, and constant awareness of His presence that comes from being filled with the Holy Spirit. Thank you, God, that we can know you in such an indescribable, remarkable, and intimate way, and that through your direction, we can effectively serve you and minister to others!

If you haven’t already today, maybe now would be the perfect time for you to run to an empty room and be alone with God! Go on. Go. Here is a song to get you started…

“Those who know Your name will put their trust in you;
For you, Lord, have not forsaken those who seek you.”
Psalm 9:10

Starry Night

Ava enjoys playing with glitter glue pens. This time, I gave her a paintbrush and had her spread out the glitter glue as she squeezed it out. This made a pretty background for a night sky. Then, I cut different sized stars out of craft foam and let Ava place them on her starry night background. As we worked, we talked about God creating the world, including the nighttime.

Postcard Travel Log Book

When I was growing up, my family had the opportunity to travel all over the country for our vacations. After being to 43 of the states myself, I consider it important for my children to have some way of looking back and seeing all the places they have visited.

It would be wonderful if I created scrapbooks of our family travels, but the truth is, I don’t have the time or the inclination. So, I came up with a very low-cost, easy, and quick way to log Ava and Landon’s vacation destinations. Each child has a photo album (a.k.a. travel book) which is being filled with a postcard from each of our trips.

When we go on vacation, I let Ava pick out a postcard she likes, I write the date on the back, and then we add it to her travel book. That’s it. I also added a 4×6 map of the United States to each of their books for them to color in the states as they visit them.

Mailbox Decoration

We made this Independence Day decoration from five pieces of construction paper, folded accordian-style, and attached together with double-sided tape. A foil-covered cardboard star completes the decoration, and string attaches it to the mailbox. This idea could also be used to celebrate a birthday, arrival of a new baby, or another holiday simply by changing the colors of paper and maybe the shape of the star, too.

Flower Girl

I first saw this idea (called “Flower Fairies”) in the June/July 2010 issue of Family Fun magazine. I instantly saw it as a great way to use the flowers Ava and I have been gathering and pressing [see post] over this spring and summer. We made our flower girl into a card for Grandma.

First I used a black pen to draw the girl on cardstock. Then Ava brushed decoupage glue on the paper and we began placing the pressed flowers on the card. That’s it. The flower girl is so cute (but not cuter than my wonderful girl, of course).

Birdie House

Ava calls this a “birdie house,” and she painted it all by herself. After cutting a bird house shape out of craft foam, I gave Ava tempera paints, a brush, and a toilet paper roll (for stamping). Pretty good for a just-turned 3-year-old!

* The bird house is only outside for the picture. The washable tempera paint wouldn’t be able to hold up to the weather.

Creative Traveling

As you already know, entertaining children (of any age) is a challenge when you are spending hours in the car. Earlier in the month, we went on vacation with Tim’s parents to Ocean Isle Beach, NC, and packing the kids’ toys and snacks to keep them happy in the car took just as much thought and work as packing for our time at the beach itself. I tried to think of a way to engage Ava for longer than 5 minutes at a time, so I decided to figure out a way for her to be able to color.

I started by shopping around and I found this plastic, purple, RoseArt clipboard at Target. It even came with sets of crayons, markers, and colored pencils. This clipboard pops open to store supplies inside – perfect for what I was aiming to accomplish. Inside the clipboard, I stashed crayons, markers, colored pencils, stickers, construction paper, and a coloring book!

The only thing missing was a holder to keep crayons/markers/pencils handy for her to reach and use and to potentially save the car’s upholstery from lost, melting crayons. So, I made one. I already had the felt, the needle and thread, and the velcro I needed. I simply folded the felt to create the long pocket, and then stitched it into mini pockets to fit crayons. Velcro attaches it to the side of the clipboard (just below where the clipboard opens).

This was the perfect size for Ava, and it met all my criteria for a creative traveling station that effectively engaged Ava and kept things simple and organized for me.